An SCA Elevation in the Time of Covid

At 12th Night January 2020 Their Royal Majesties of Atlantia floored me with a Writ to contemplate joining the Order of the Laurel at Gulf Wars.

Like any new candidate there was squeaking and planning and ordering fabric and writing invitations and a hundred other things.

Then, Covid.

Gulf Wars was cancelled, and I won’t lie, I cried over a dream that fell apart.  We were on military orders to leave Atlantia and head to Drachenwald.  Now what?

With Their Majesties indulgence and a lot of work from my amazing peer, Mistress Marion, a virtual vigil and elevation was planned.  My husband conspired with them and it became a magical affair.  I wanted to share with you what worked, what was hard, and what didn’t work as well in hopes that it may be of assistance as the shutdowns due to Covid linger on.


Vigil:

https://www.facebook.com/libby.cripps.5/videos/10159303298102784/?t=0

My vigil was amazing. I had come from West Kingdom to Atlantia and a virtual vigil allowed me to talk to people from Alaska to Italy.  I spent hours laughing and crying and listening to amazing wisdom.  Many long time peers commented that being able to hear everyone’s words was incredibly special.

What worked (set up):

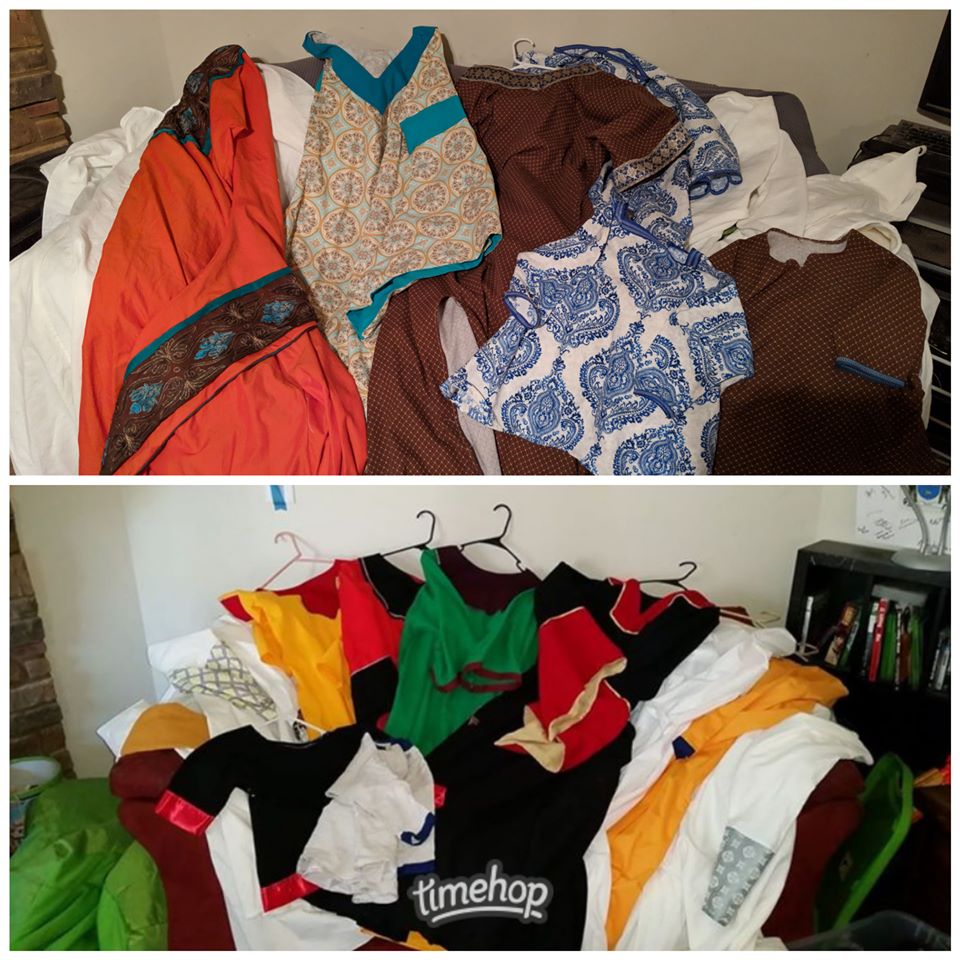
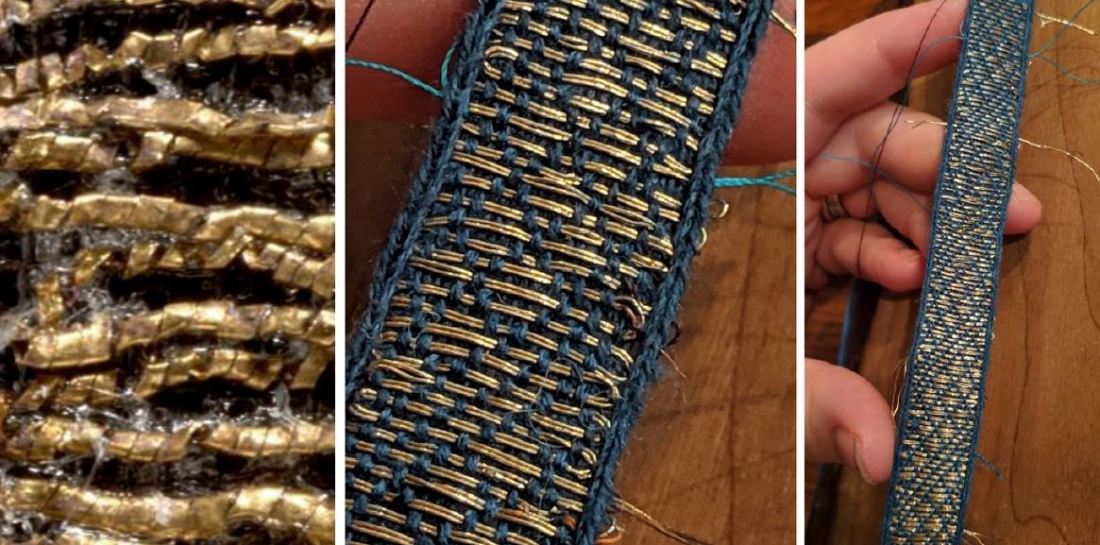
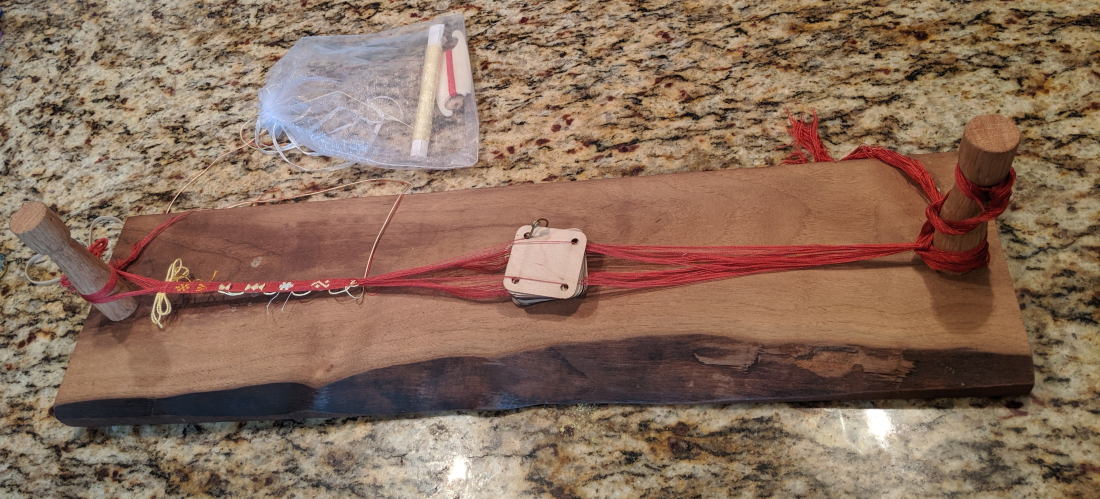
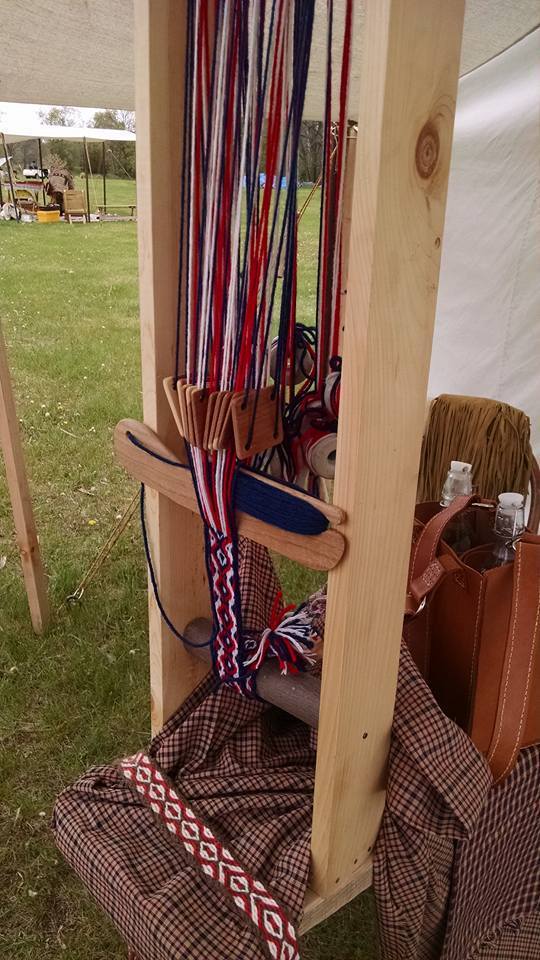
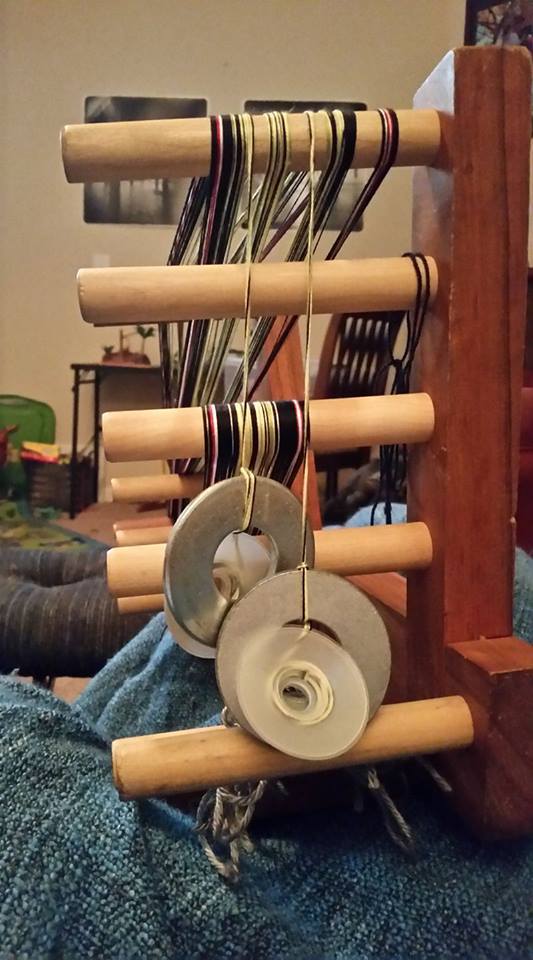
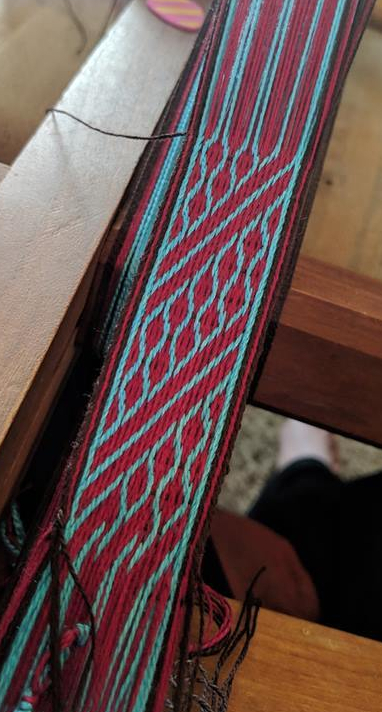
  • We set up a dedicated room for my vigil in a spare bedroom.  It was decorated much like a vigil tent with banners, decorations, drinks, and snacks.  There was a display of my work and of gifts from others who had prepared them for the vigil.
  • We set up two devices – a laptop at head height gave me a comfortable way to talk to guests and speakers through zoom.  A phone mounted across the room live streamed the entire thing on Facebook.
  • We planned a full evening, and planned it ahead of time.  I had time to mentally prepare to be on stage for 6 hours.
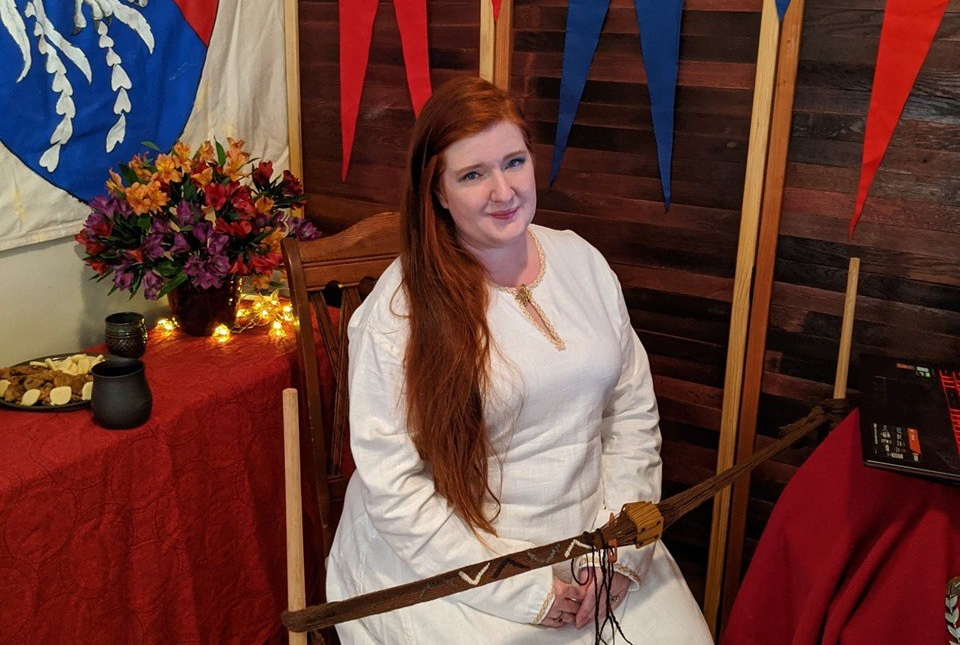
  • Like the room, I dressed in a special vigil gown.
  • My hubby provided tech support (turned the phone sideways so the video would be right side up, answered questions, etc).
  • My peer used a pro Zoom account to allow us unlimited guests / time frame and shared the link but set the call to require approval for guests.  This let her make sure notables and Their Majesties would be able to access the group.

What worked (vigil)

  • The notable speakers were part of the opening of the vigil instead of the elevation ceremony.
  • My husband acted as hands for Their Majesties and they directed him as such.
  • My peer managed the speakers – unmuting and directing each person to speak in their turn.  She used two devices for this, one that was “her” and one that stayed on the guest list screen that she used to control and monitor the audience and chat.
  • After the vigil officially began, Marion kept a running list of the order of guests to speak.  We went by order of joining the chat.  Zoom makes this slightly challenging as it automatically sorts guests into alphabetical order – instead of time joined.

Lessons learned:

  • The only thing I’d have changed was to have my peer and her husband there with us.  The audience was amazing, the speakers were phenomenal.  I have a video of my vigil and so much wisdom to carry forth with my journey.  That is truly priceless.


Elevation

https://www.facebook.com/libby.cripps.5/videos/10159306068802784/?t=0

The elevation was more challenging.  This was one of the first virtual courts, and we learned valuable lessons (like don’t put laptops in the sun! lol).  There was still a lot of awesome.

I got dressed early and we did a mini photo shoot down the street in my gown, but no regalia.  I shared these photos just before court began.

The tech set up was similar to my vigil.  There was a zoom conference laptop with Their Majesties, and a mobile phone streaming to Facebook.  Their Majesties were streaming on YouTube.

My family was again planned to act as hands for Their Majesties, and all were in garb.  This is also the one thing I’d change, I would have loved to have my peer there if we couldn’t have had regular court.

Keep it a surprise!  I had seen my wreath, but the rest of the regalia and the scroll were amazing surprises that made the day a treasure.

After the ceremony, we did additional photos with regalia.  These were so much fun to share!

The Takeaway

If I had one piece of advice for anyone planning a virtual court or ceremony it’s get rid of the mundane.  Creating a space where the sink full of dishes, the tv, etc aren’t in your face is very helpful.

Have some support.  The hubby refilling my cup or fixing the camera was priceless for a long vigil.

We can create our own magic in times when the world won’t let us create it together.  Below is a photo album of my little bit of magic.

If you have questions, please feel free to reach out to me!

This slideshow requires JavaScript.


Advertisement

SCA Documentation made easy

Documentation is the scary word of A&S competitions and display. It definitely doesn’t have to be! This is my sample form that may be helpful. Mistress Marion (Ellen T Hopkins) sent me her article early on my A&S journey and it was incredibly helpful. Becca Huck taught me to include a “what went wrong” section.

The biggest “trick” is visual simplicity. I’ve had judges comment that “you didn’t say why you subbed” or “what about x” and my instinctive response is “well on page 4,paragraph 2..” and I realized that didn’t work.

This simple design is like a cover sheet, I use it even with more thorough supporting documents. But it answers the most common questions at a glance.

Documentation Example

For ease, here is the same form in PDF and MS Word formats:

Documentation Example PDF

Documentation Example MS Word

T-tunics 201

When I first began playing in the SCA I had NO IDEA how to sew, much less actually make clothing.  I had an entire family to garb, and very little skill in doing so.  I fumbled and bumbled and stressed my way through it.

Then Gulf Wars… 10 days… 3 people, including a fighter that would wear multiple outfits a day and a toddler who’d wear several each day as well.  We needed clothes, a lot of them.  I was on day number next of threatening to throw the sewing machine out the window and run away when I vented my frustrations to my laurel.  Who raised an eyebrow and said “just make T-tunics!”  My mental picture of an overlarge t-shirt wasn’t flattering on anyone, and I was vain enough that it mattered.  “No really” she said “go look at the fighting tunic Jon borrowed from Elesar.  It’s just a t-tunic.”  I went and looked  and it was like fireworks exploded in my brain.  Here was a simple shaped 2 piece garment, that looked Good.

Fast forward a bit, and I’ve gotten a lot more experience making garb, but I still very frequently create T-tunics, and it always boggles minds how they can look.  So by request.. t-tunics 201:

These are all T-tunic assembly:


By T-tunic I mean as few pieces as possible.  Generally the sleeves and body piece are one piece. Sometimes additional length is added to the sleeves or gores to the sides.  These should still fit well, and pass easily for historically representative garb.

Here is a booklet I created for teaching a T-tunics 201 class.  I hope it is helpful, andplease do not hesitate to reach out with any questions!

The booklet is designed to be printed double sided, flipped on the short edge, and folded in half.

T-tunics 201


Minoan: the challenges & the fun

As I’ve continued working on Minoan and bronze age Aegean sea area clothing I’ve ran into some fascinating challenges, and some even more fascinating insight!

“Restored” images & fragments

One of the biggest challenge is fragmentary frescoes, and the recreation of them.  Knossos was discovered by Sir Arthur John Evans, a British archaeologist, who “restored” many of the frescoes there as he thought they should be with the assistance of Swiss artist Émile Gilliéro.   The artist’s son, by the same name, later did further restoration work when an earthquake damaged some of the remaining images.

More recently, archaeologists such as Dr. Bernice Jones have been challenging some of the assumptions of how these frescoes were restored, and seeking to refine our understanding of the original art.  This is an ongoing project, and there is often small disagreements that result in dramatic changes of how a fresco is interpreted.

Minoans LOOOVVVEED their Wallpaper

Frescoes were not a single layer!  Many had been painted over several times during the Bronze age, making the puzzle of putting them back together even more challenging.  (For example, assemble 3 puzzles on top of each other, now break chunks of them off and mix those pieces into a bowl, try to match the pieces back in the right layer on the right puzzle.  Oh, and similar colors and paint styles were used, so make sure your puzzles are very similar too).

When is “wool” wool – and when is it a dollar?

Linear B has been translated, mostly, we think.  It’s not a direct translation of ancient Greek, it’s older, and after it passed away on the Minoan isles there was about a 300 year gap called the Greek dark ages before a written language (the Greek alphabet) was used again.  Much of Linear B was translated in the 1950s, but there are still questionable translations and complete unknowns.

One of the challenges in language is how certain words were used.  There are a group of tablets from the palace at Knossos where the translations result in fabric being compared to various amounts of wool.  The way we would say “$50 worth of fine silk” or “$100 of rough cotton”.  Wool is compared to cloth and separately to “edged cloths of a royal type” (Panagiotakopulu, Eva, University of Edinborough)

Fabric, fabric, and more fabric!

Minoans had a surprisingly wide variety of fabric and animals that could be harvested for fabric.  Frescoes depict a number of goat, sheep, and other furred animals as well as silk moths, cotton plants, and flax type fibers.  Some fresco images show fabric solid enough to cover the body completely, while others are depicted as incredibly sheer.   Clay tablets written in Linear B have been translated with words for sheep, goats, wool, and fabric.  Must of the trade from Knossos was dedicated to textiles.

How did they make that?

A common assumption is that Minoans were limited to warp weighted looms and tabby woven bands, what we frequently call inkle bands.  The patterns in trim on the fresco images are incredibly complex, as are those of the fabrics, and could have been created in a number of ways.  I was unable to find obvious tablets as early as 1300 BC, but there are bone tablets from 8th Century BC in central Italy that are were clearly used for tablet weaving. The wear patterns along the lines of the cards are the same that my own favorites get after frequent use.


In short – combining a lot of different pieces and angles of investigation is yielding an incredible wealth of knowledge.  Creating, and wearing, the clothing depicted in frescoes has added even more information.  I’m preparing a more detailed write up piece by piece, and will post it soon!

Going Minoan (or Mycenaean!)

A few years ago the California summers had me digging for SCA garb that was cooler than Viking.  I mean, there are European countries that are hotter so there HAD to be cooler garb, right?

Greek or Roman was a common suggestion, but I felt blimpy and  weirdly bundled into that much fabric.  Textiles from the time period were much more finely woven and had a delicate draping quality that the mass produced linens available today do not have.

Enter Minoan!  Vestia Antonia Aurelia caught my eye with her phenomenal work creating Minoan style garb and I began piling up research.  Life happened and my interest got sidelined a bit.

Vestia has several really awesome collections giving a lot of insight and information:

Then Southern Summer, oh that muggy, heat filled, maximum humidity death by heat and water….

Back to Goin’ Minoan research!   This time I started with a broad collection of cultures and imagery from around the Minoan islands in 1300 BC.  Mycenaean and Minoan cultures had a lot in common, and a lot of trade between the two islands.  One particular fresco caught my eye.

The Mykenaia, found at the Southwest Building at Mycenae, is rather uncommon in that it shows a frontal view of the front of a dress, and one that seemed to indicate a bolero style jacket on the top.

Bernice R. Jones has done a lot of research into Minoan, and her information on this fresco was invaluable.  You can find some of her work here:  AJA Online Article 21

Above is Dr. Jones rearrangement of the fragments, and this is her suggested reconstruction:

I began with the bolero style jacket.  It has a deep V back and the most fabric efficient method of making it is to take a simple rectangle of fabric, and cut a V into the center bottom of it.  Fold the edges up to create sleeves, add some trim, and voila:


Fitting notes:  This took a few tries to get right because the arm-scythe is actually a deep angle.

  • The width of the fabric is your measurement elbow to elbow
  • The height of fabric is your arm gusset + seam allowance.
  • Fold fabric in quarters and mark the center edges on the bottom and both short sides
  • Draw a V going up from the center bottom.  The top width of the V should be your measurement from side seam to side seam.

The top still didn’t fit quite right, so after looking at a lot of fresco images, I decided to add a second row of trim to the top of the bolero:

This changed how the back hung and stiffened up the shoulder line in a way that kept it in the right spot.

The dress fitting was comparatively easy.  They seemed fairly snug fitting in the top but room enough for easy movement (several frescoes show figures bending, walking, moving, etc with legs farther apart).  The top had a deep V neckline, but in this fresco was clearly covering the breasts.


One very common element in Minoan women’s clothing is either ruffles or fringe on the bottom of skirts.  I didn’t find striped linen in a red/yellow/gold so used these cooler colored stripes to create the offset patterned like in the fresco.  From a weaver perspective, either of these would be easy to weave.

For a final step I made beaded necklaces and bracelets to wear with the dress.

I noticed in the fresco that the beaded necklaces did not extend over the bolero.  I’m curious if they may have been pinned into place similar to viking beads.  “The Archaeology of Greece” by William R. Biers lists a variety of wire fibula shapes found in Minoan digs.  I tried this for my bolero, pinning 3 strands of beads to the sides.  This worked really well and kept the bolero from riding backwards.

Another neat resource is a video of a hairstyle:  Ancient Hairstyles

Note:  TRIM!  Minoans sure loved it!  They most likely were using tabby weave trim, such as can be done on an inkle loom or rigid heddle.  There is a lot of yardage of trim on this garment, and more coming on the apron.

Look for part 2 🙂

Going Minoan: The earliest European cultures

Goin’ Minoan album is live!

The first page consists of short notes about the civilization and area

The next section of pages are images from the island, the ruins, and the frescoes there.

The next section consists of reproductions by Jones (major authority!) and a few inspired paintings that are particularly well done.

The colored edge drawings are mine – I started with the basic shape of a woman and outlined the various dresses we see in the fresco images. This helps compare the overall shape and layers of the dresses.

The final pages are jewelry, hairstyles, and shoes to finish off the look.

Enjoy!

12th – 16th Century Tablet Woven Brocade Class Notes and Handout

One of my favorite classes to teach is Brocaded Tablet Weaving in the 12th – 16th Centuries.  I bring handouts to the class, and when available, also use projectors to add to the class.

Both files are long, and use a lot of color, so I have attached them here for download.  Please feel free to share and use with accreditation.

Presentation Notes:

12th – 16th Century Brocade Tablet Weaving Presentation

Handout:

12th – 16th Century Brocaded Tablet Weaving Handout


Which loom to chose?

One of the more common questions among beginning tablet weavers is what loom to purchase or build.  Starting a new hobby with a $80+ investment can be a bit intimidating, especially if you just want to try it out.

Here are the looms I use in my preference order, along with notes about each.

Peg Oseberg Loom

1.  This is the simplest loom I use, and my favorite.  Its 2 vertical pegs, each a 6″ piece of a 1″ dowel, pushed into a board.  I have several board lengths from 24″ to 48″.  They’re incredibly portable and durable.  Using these is very close to the Oseberg-style vertical looms used throughout most of the SCA time period.

  • Using these does mean measuring your warp on a different surface.  I usually use chair legs on the table.
  • I hook a drawstring pouch over one peg to hold shuttles and thread when traveling or storing my loom.
  • These are wonderful for brocade or missed hole techniques because the cards rest on the surface of the loom and don’t twist around.
  • There is no easily adjustable tension.  For small changes I’ve twisted the warp around the peg a bit, or tucked something under the end of the threads to add a bit of tension to them.
  • Josefina Alfdis Nelson commented that she uses one like this too, with a great suggestion! But I tie a slip knot in the warp and tie it to the pegs with lucet cord. This lets me adjust the tension by tightening or loosening the cord rather than the whole warp.”

Inkle Loom

2.  The inkle loom was my first purchased loom, and its still a wonderful workhorse.  The style is entirely modern and there’s nothing quite like it used in SCA time period.  However, it is portable, very beginner friendly, and adaptable.

  • Warps can be measured directly onto the loom without a separate warping board.
  • A pouch looped onto the first upright can hold shuttles or threads.
  • Adjustable tension – enough said!
  • Circular warps or speed warps make setting up the loom fast.
  • The cards hang on the threads without a supporting surface, this can make them prone to unintended twisting or movement in lower tension setups.
  • The space between the front peg and the top peg on the front arm is your working area.  Depending on the size of the loom and your pattern, this can make dealing with twist frustrating as it will have to be pushed back over that peg.

Box loom

3.  There is some evidence of box looms like these being used late in the SCA period.  They’re also very portable and have a lot of easy tension adjustment.  However, they can be more of a challenge to set up.  (The um, unique, weaving here is courtesy of a very eager 4 year old.)

  • Warps must be measured separately before being put on the loom.  There is an album on my Facebook page (Libby Cripps) on how to warp up and begin weaving on this type of loom.
  • There is no where for tension to go, patterns must be reversed or twist neutral to weave.
  • It’s important to keep the warp neatly stacked up when rolling it onto the loom.  Uneven warps can cause tension issues later in the weaving project.

Oseberg style loom

4.  Oseberg style loom.  This type of loom is 2 upright poles with some kind of spreading base and feet holding them up.  Some illuminations show a center horizontal shelf as well.  The name comes from a Viking ship find that contained one of these looms, while the style continued to be shown in illuminations all the way into the 16th century.

  • Warps do need to be measured separately before being set up.
  • The larger size takes up more work space and is less portable.
  • Most of these today are designed to disassemble easily for transport.
  • The weight of the cards has a lot to do with the tension on this type of loom.  Loose tension can also make cards want to slip out of order and flip around to the outer side of the pack.
  • Loose uprights can also cause changing tension as one is weaving.
  • The weaver works from the side of the loom instead of the front, this is different than most modern setups and can be disorienting.

Board loom

5.  These type of board looms were one of the first I was introduced to.  They’re fairly simple to make – a 48″ board has several end pieces trimmed off of it, then stacked up and drilled through.  Carriage bolts are used to secure them.   The warp is threaded back and forth through the boards to hold tension.

  • Like the peg and Oserberg-style loom, these can hold warps of any length.  Excess can be rolled onto bobbins or chained crochet style.
  • Cards do rest on the board surface, making this easier to use for brocade or missed hole technique.
  • Advancing the warp or adjusting the tension requires mostly disassembling the loom and redoing the setup.   This can be time consuming.
  • Keeping even tension can be challenging.


Other Options

Warp Weighted:  One of the oldest styles of weaving is using weights, generally of clay or stone, to keep downward tension on a warp that has been attached to a fixed surface at the top.  This technique can accommodate any length, and does not require complex equipment.  I don’t have photos or use a loom like this as I have small children and dogs.  Dangling weights would be the coolest toy of 2019!

Courtesy of Ann Karen Gronbeck-Peterson, this is one style of warp weighted loom shown in later period illuminations.  She gave the following woodworking instructions:

This is about 4 feet tall, with the sides & bottom made of 1 X 4 lumber. It is about a foot wide, a couple of inches narrower than my shuttle, so that the shuttle can be parked in place when I’m not weaving. There is a piece of bark-on Silver Maple about 2 inches in diameter at both the top & about 6 inches up from the bottom. The top piece of Maple is fastened in place a couple of inches from the top; with 2 nails in each end of the Maple, through the side boards so that it is stable. The bottom piece of Maple is cut about 1/8″ shorter than the top one, & has only one nail through the board into each end; and to allow for winding on of finished weaving, a hole is drilled through one side of the board frame & into several spots of the end of the Maple for a pin to hold it from unwinding. I use a wooden clamp to attach the bottom board of the Loom to a 3-legged table which I made.

62497912_2355057501236632_9113353876882325504_n

Backstrap:  This is another no equipment needed way to try out tablet weaving.  Attach one end of the warp to your belt, and the other to a fixed surface.  (I used a stationary bicycle my first time!)  By leaning forward or backward you adjust the tension on the warp.  There are backstrap kits that add use bars to tie the warp onto with hooks to go over your belt.


Starting and Finishing Tablet Woven Bands (and some other hacks!)

On Facebook there is a wonderful group of artists called Historic Tablet Weaving.  It’s an amazing source of knowledge and inspiration.  One of the posts that pops up fairly frequently I see in several other band weaving groups is how to start or finish bands so that they don’t unravel.  I made these two videos:

Beginning Tablet Weaving

Ending a Tablet Woven Band

I hope these are helpful!

In addition, one of my favorite “hacks” is to deal with twist by warp weighting some of my cards in a pattern.  For example, Ram’s Horn is a commonly used pattern that has two cards that build up twist constantly, while the rest of the pattern remains twist neutral.  Warp weighting just those two cards allows me to continue to weave quickly, while easily handling any twist build up.

24058844_10156347759487784_982229893852247765_n


12th Century Tablet Weaving: Inspiration and Creation

My favorite area of research is the late 12th / early 13th century in Western Europe, primarily France, Germany, and Italy.  I’ve got an incredible amount of close up photos and statuary for someone who’s not been lucky enough to visit those areas!

Just recently I stumbled on an incredible treasure, the Gospels of Henry the Lion.  Written sometime between 1175 – 1188 the book is INCREDIBLE (a few peeks are above!).  The pages are full of gorgeous full color illuminations and they’re simply breath taking.  I could rattle on for quite a while, but I’ll try to keep focused. If you’d like to check out more of the manuscript, it’s here:  http://diglib.hab.de/mss/105-noviss-2f/start.htm

I’ve had this stunning red orange overshot fabric set aside for a new bliaut, and this time I decided to weave trim for it.  As I have a small child, I wanted a more durable woven in pattern than an elaborate brocade, but still wanted to be true to the styles of the period.

Drawing upon the statues at Saint Loup de Naud (detailed photos below), I decided on a simple pattern using a mix of diamonds and diagonal lines.

Notes on color choice:  One thing many artists struggle with is creating images with up close and distant impact.  The single BEST tip I ever got was to take a photo of your planned colors in black and white.  If there’s clear contrast, your design will pop in color as well.

For this, I chose colors from the manuscript – a burgundy 2/20 silk from Eowyn De Wever and a light teal silk I dyed myself.   The pattern is 26 cards wide with a chocolate colored 2/20 silk border for contrast (personal aesthetic).

49140143_378744836210493_1583067096391090176_n

48376467_10157630467912784_1836707150265581568_n

I’ll use the trim along the neckline of the dress as well as the sleeves.